Looking for a quick and easy way to elevate your DIY manicure without dropping lots of money at a salon? Ready-to-wear nail tips are the hottest new secret weapon for instant, flawless looking nails. Whether you’re rushing to a last-minute event or just want to extend your nail length in a snap, these tips will have you looking made-up in no time.
Why Press-On Nail Tips?
Maniology just dropped a new line of press-on nail tip DIY kits, and they’ve been a hit since launch. Let’s talk about why press-on nail tips have been trending lately:
- Instant Glam: No need to wait for polish to dry or risk smudging your fresh mani. These tips are pre-polished and ready to go.
- Variety for Everyone: From milky whites to nude tones and even clear tips with a chic chrome finish, there’s a style for everyone. Plus, they’re perfect for stamping your custom designs.
- Custom Fit: Worried about fit? Don’t be! With 10 different sizes in each set, you’re sure to find your perfect match. And if not, I’ll show you how to customize them for the ideal fit.
- Reusable: With the right care, you can rock these tips more than once, making them as practical as they are pretty.
What’s in the Kit?

When you open up your set of ready-to-wear nail tips, here’s what you’ll find:
- Nail Tips: Each box comes with 10 sizes, with two of each, so you can find your perfect fit.
- Sticky Tabs: These little lifesavers help the tips adhere to your natural nails securely.
- Alcohol Pad: Essential for prepping your nails by removing any oils or residue.
- Emery Board: For shaping and smoothing both your natural nails and the tips.
- Nail Glue: If you want a longer-lasting hold, this is your go-to.
- Orange Nail Stick: Perfect for pushing back cuticles and cleaning up around the nails.
Step 1: Prepping Your Natural Nails

Before we get to the fun part, it’s crucial to prep your natural nails. Here’s how:
- Buff the Nails: Gently buff your nails using the white side of the emery board. This creates a smooth surface for the tips to adhere to.
- Shape Your Nails: Use the emery board to shape your nails if needed.
- Clean with Alcohol: Wipe your nails with the included alcohol pad to remove any dust and oils. Clean nails mean a longer-lasting bond!
Step 2: Finding Your Perfect Fit

Size matters when it comes to nail tips. Here’s how to find your perfect match:
- Edge-to-Edge Fit: Choose a tip that covers your natural nail from edge to edge. If it’s too small, it won’t adhere properly. If it’s too large, it might feel uncomfortable.
- Customize if Necessary: If the tip is slightly too big, gently file down the sides until it fits just right.
Step 3: Applying the Tips

Now for the moment we’ve all been waiting for—applying the tips!
- Choose Your Adhesive: You can use the sticky tabs for easy application and removal or go for the nail glue if you want your tips to stay put for a week or more.
- Sticky Tabs Method:
- Apply the sticky tab directly to the inside of the nail tip.
- Press the tip onto your natural nail, starting from the cuticle and smoothing it down. Hold it for a few seconds to ensure it adheres properly.
- Tip: Use a blow dryer on low heat for a few seconds to activate the adhesive and make it even stickier!
- Nail Glue Method:
- Apply a thin layer of nail glue to the inside of the tip and your natural nail.
- Press the tip onto your nail and hold for 5-10 seconds.
- Remember, this is a longer commitment, so be sure you’re ready to rock these nails for at least a week!
Step 4: Shaping and Customizing Your Tips

Not a fan of the length or shape? No worries—these tips are super customizable.
- Trim to Your Desired Length: Use nail clippers to trim the tips to your preferred length.
- Shape It Up: Use the emery board to shape the tips. Go for almond, coffin, square, or even a trendy squoval (square-oval) shape. The possibilities are endless!
- Customize the Fit: If your nail beds are more curved, gently heat the tips with a blow dryer and mold them to match your natural nail curve.
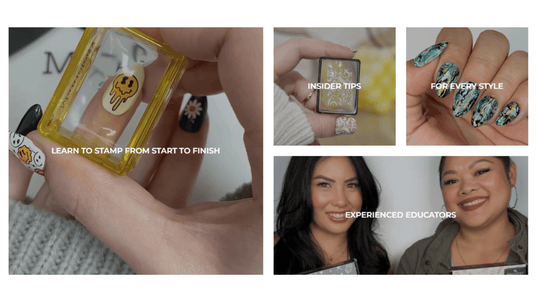
Step 5: Get Creative with Stamping

One of the best things about these ready-to-wear tips is that they’re perfect for nail stamping! Here’s a quick guide:
- Choose Your Design: Whether it’s stars, galaxies, or something more intricate, pick your favorite stamping plate.
- Stamp Before Applying the Tips: For easier application, stamp your designs on the tips before applying them to your nails.
- Use Smudge-Free Top Coat: After stamping, seal your design with a smudge-free top coat to keep it looking fresh and polished.
Step 6: Removal and Reuse

When you’re ready to switch up your look, removal is a breeze!
- Soak in Warm Water: If you used sticky tabs, soak your nails in warm soapy water for about 10-15 minutes to loosen the adhesive.
- Gently Remove: Use the orange wood stick to carefully lift the tips off your nails.
- Clean Up: Remove any leftover adhesive with cuticle oil and gently buff your nails.
Ready, Set, Slay!
And there you have it—a complete guide to transforming your look instantly with ready-to-wear nail tips! Whether you’re a nail newbie or a seasoned pro, these tips make it easy to achieve salon-worthy nails at home. So go ahead, pick your favorite style, and get ready to slay all day.
Don’t forget to share your fabulous manicures with us on social media using #Maniology—we love seeing your creativity in action! Until next time, keep those nails looking fabulous!


